
When it comes to desserts that cater to various dietary needs, gluten, soy, and dairy-free recipes can often feel limiting.
However, these desserts are not only accommodating but can also be utterly delicious and satisfying.
I’ve experimented with numerous combinations, and this collection of simple, delightful desserts has become a staple in my kitchen.
From rich chocolate flavors to fruity delights, each recipe is crafted to ensure everyone can enjoy a sweet treat without compromise.
The History and Cultural Significance
• Gluten Soy Dairy Free Dessert Recipes Simple And Delicious traces its origins to the rise of gluten-free diets in the late 20th century, where health-conscious individuals sought alternatives to traditional desserts.
• The dish evolved over decades as ingredients like almond flour and coconut milk gained popularity, eventually becoming the beloved versions known today.
• In many health-conscious communities, these desserts serve as staples at gatherings and celebrations, symbolizing inclusivity and creativity.
• While many variations exist across different cultures, the authentic versions maintain a focus on natural sweetness and wholesome ingredients that set them apart.


Recipe Overview
Nutritional Information (per serving)


Ingredients


Essential Equipment Guide
Food Processor: This tool is crucial for blending ingredients smoothly, especially when making nut-based desserts. Look for one with a strong motor and multiple speed settings to achieve the desired consistency.
Baking Dish: A good-quality baking dish ensures even cooking and proper texture. Opt for glass or ceramic to retain heat well and avoid any unwanted chemical reactions from metal pans.
Mixing Bowls: Essential for combining ingredients without mess. A set with various sizes allows versatility, and look for non-reactive materials like glass or stainless steel.


Preparation Methods
Mixing Techniques: Proper mixing is crucial for achieving the right texture. Use a gentle folding method when incorporating dry and wet ingredients to avoid overmixing, which can lead to dense desserts.
Chilling Time: Allowing desserts to chill helps them set properly. This step is vital for achieving the right consistency and enhancing flavors. Aim for at least 30 minutes in the refrigerator before serving.
Baking Temperature: Preheat your oven to the correct temperature before baking to ensure even cooking. An oven thermometer can help verify accuracy, as even slight variations can impact the final product.


Step 1: Prepare Ingredients

Gather all your ingredients and measure each one accurately.
This ensures you have everything you need at hand and prevents any surprises mid-recipe.
Be sure to check for the freshness of your baking ingredients, especially the baking powder and spices.
Preparation is key to a smooth cooking process.
Step 2: Mix Dry Ingredients

In a large mixing bowl, combine almond flour and coconut flour.
Add baking powder and a pinch of salt to enhance the flavors.
Use a whisk to ensure all dry ingredients are evenly blended without clumps.
This step is crucial for achieving a uniform texture throughout the dessert.


Step 3: Combine Wet Ingredients

In a separate bowl, mix together the maple syrup, coconut oil, and vanilla extract.
Make sure the coconut oil is melted but not too hot, as it can cook the other ingredients.
Stir the mixture well until it becomes smooth and homogenous.
This will help in evenly distributing flavors in the final batter.
Step 4: Combine Dry and Wet Ingredients

Pour the wet ingredients into the bowl with the dry ingredients.
Gently fold the mixture together using a spatula to avoid overmixing.
Look for a thick batter consistency that should be easy to spread.
This technique helps maintain the light and airy texture of the dessert.
Step 5: Prepare Baking Dish

Grease your baking dish with coconut oil or line it with parchment paper.
This prevents the dessert from sticking and makes for easy removal once baked.
Ensure the dish is evenly coated to avoid any sticky spots.
A well-prepared dish contributes to the overall presentation of the dessert.
Step 6: Pour Batter into Dish

Transfer the batter into the prepared baking dish, spreading it evenly.
Use a spatula to smooth the top for a professional finish.
Ensure no batter is left clinging to the sides of the bowl.
This step sets the stage for even baking and a nice rise.
Step 7: Bake the Dessert

Place the baking dish in a preheated oven set to 350°F (175°C).
Bake for approximately 25 minutes or until the edges are golden and a toothpick inserted comes out clean.
Keep an eye on the color of the top to avoid over-baking.
This step is essential for achieving the perfect texture and flavor.
Step 8: Prepare the Topping

While the dessert is baking, prepare the fruit topping by washing and slicing the berries.
If using frozen berries, allow them to thaw and drain excess liquid.
This topping adds freshness and a pop of color to your dessert.
Set aside until the dessert has cooled slightly.
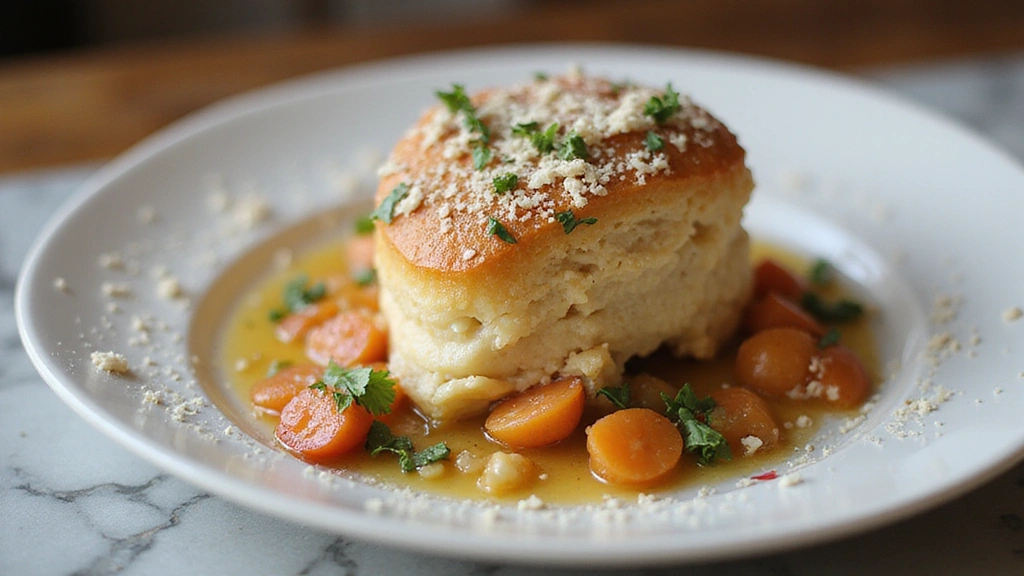
Step 9: Assemble the Dessert

Once the dessert has cooled for about 10 minutes, remove it from the baking dish.
Top it with the prepared berries, arranging them evenly over the surface.
This not only enhances the flavor but also gives a beautiful presentation.
Serve warm or at room temperature for the best experience.
Step 10: Serve and Enjoy

Cut the dessert into squares and plate them for serving.
Consider garnishing with a sprig of mint or a dusting of powdered sugar for an elegant touch.
Encourage guests to enjoy the dessert while it’s fresh for the best flavor.
This final touch elevates the overall presentation and enjoyment.
Critical Timing and Temperature Guide
Baking Time: Bake the dessert for 25 minutes, checking for doneness with a toothpick inserted into the center. A clean toothpick indicates it’s ready, while a wet one suggests it needs more time.
Cooling Time: Allow the dessert to cool for at least 10 minutes before serving. This helps it set properly and makes it easier to cut.
Serving Temperature: For the best texture, serve the dessert at room temperature. If serving later, store in an airtight container to maintain freshness.
Pro Tips for Gluten Soy Dairy Free Dessert Recipes Simple And Delicious
• Ingredient Selection: Choose high-quality almond and coconut flour, as they directly impact the flavor and texture of the dessert.
• Preparation Secret: Let your coconut oil cool slightly after melting before combining it with other ingredients to prevent cooking them.
• Temperature Management: Ensure your ingredients, especially wet ones, are at room temperature for a more homogenous batter.
• Texture Enhancement: Use a light hand when folding ingredients to keep the batter airy and fluffy.
• Flavor Layering: Consider adding a hint of citrus zest to the batter for an additional flavor layer.
• Make-Ahead Strategies: Prepare the batter a day in advance and store it in the refrigerator until ready to bake.
• Restaurant-Quality Finishing Touches: Top with a dollop of coconut whipped cream just before serving for a gourmet touch.
• Equipment Optimization: Use a silicone spatula for easy mixing and scraping, which helps reduce waste.
Troubleshooting Common Issues
• Texture Too Dense: This can occur from overmixing the batter. To prevent this, mix just until combined and no dry flour is visible.
• Flavors Unbalanced: If the dessert tastes bland, consider adding a pinch of salt or a dash of vanilla extract during preparation.
• Not Setting Properly: If the dessert doesn’t firm up, it may need additional baking time. Check with a toothpick for doneness.
• Too Sweet: If the dessert is overly sweet, reduce the amount of maple syrup next time or balance it with a tangy topping.
• Burnt Edges: If edges brown too quickly, consider covering the dish with foil for the last few minutes of baking to prevent burning.
• Sticking to the Dish: If the dessert sticks, ensure your baking dish is well-greased or lined with parchment paper.
Variations and Regional Differences
• Chocolate Chip Variation: Add dairy-free chocolate chips into the batter for a rich chocolate flavor, popular in many modern adaptations.
• Italian Version: In Italy, almond flour is often used with a hint of lemon zest, reflecting the local preference for citrus flavors.
• Asian-Inspired: Incorporate coconut milk in place of the oil for a richer flavor, a common practice in many Asian desserts.
• Modern Interpretations: Today, many chefs experiment with superfoods like matcha or spirulina to enhance both flavor and nutrition.


Food Science Behind the Recipe
• Emulsification: The process of blending oil with wet ingredients creates a stable mixture, ensuring a consistent texture throughout the dessert.
• Moisture Retention: Coconut flour absorbs more moisture than regular flour, which is why balancing it with almond flour is essential for a tender crumb.
• Sweetness Balance: Natural sweeteners like maple syrup not only provide sweetness but also contribute to moisture and flavor complexity.
Frequently Asked Questions
What’s the most common mistake people make when preparing gluten, soy, and dairy-free desserts? Overmixing the batter leads to dense, tough desserts. Mix just until combined for the best texture.
Can I prepare components of this dish in advance? Yes, you can prepare the batter a day ahead and store it in the refrigerator.
How do I adapt this recipe for dietary restrictions? Substitute almond flour with sunflower seed flour for nut allergies, and use agave syrup instead of maple syrup for stricter diets.
What’s the best way to store and reheat leftovers? Store in an airtight container in the refrigerator for up to 3 days. Reheat in the microwave or enjoy at room temperature.
Can I freeze this dish? Yes, wrap individual portions in plastic wrap and freeze for up to a month. Thaw in the refrigerator before enjoying.
What wine or beverages pair best with this dish? A light sparkling wine or a fruit-forward rosé complements the flavors beautifully.
How can I scale this recipe up for a crowd? Double the ingredients and use a larger baking dish, adjusting baking time as necessary.
What side dishes complement this recipe best? Fresh fruit salads or a light sorbet enhance the dessert experience.
How do professional chefs elevate this dish for restaurant service? They often serve it with artisanal sorbet or a drizzle of homemade fruit coulis for a gourmet touch.
Serving and Presentation Guide
• Traditional Presentation: Serve the dessert on a rustic wooden board, drizzled with pure maple syrup and garnished with mint leaves for a classic look.
• Modern Plating Ideas: Create a deconstructed dessert by layering the cake with berry coulis and whipped coconut cream in a glass.
• Accompaniment Suggestions: Pair with a scoop of coconut sorbet and a sprinkle of crushed nuts for added texture.
• Special Occasion Presentation: Use individual ramekins for a personalized touch, topped with seasonal fruits and edible flowers for a festive appeal.
Conclusion
This gluten, soy, and dairy-free dessert proves that dietary restrictions do not mean sacrificing flavor or enjoyment.
I encourage you to try these simple yet delicious recipes in your kitchen.
With a bit of creativity and the right ingredients, you can create desserts that everyone will love.