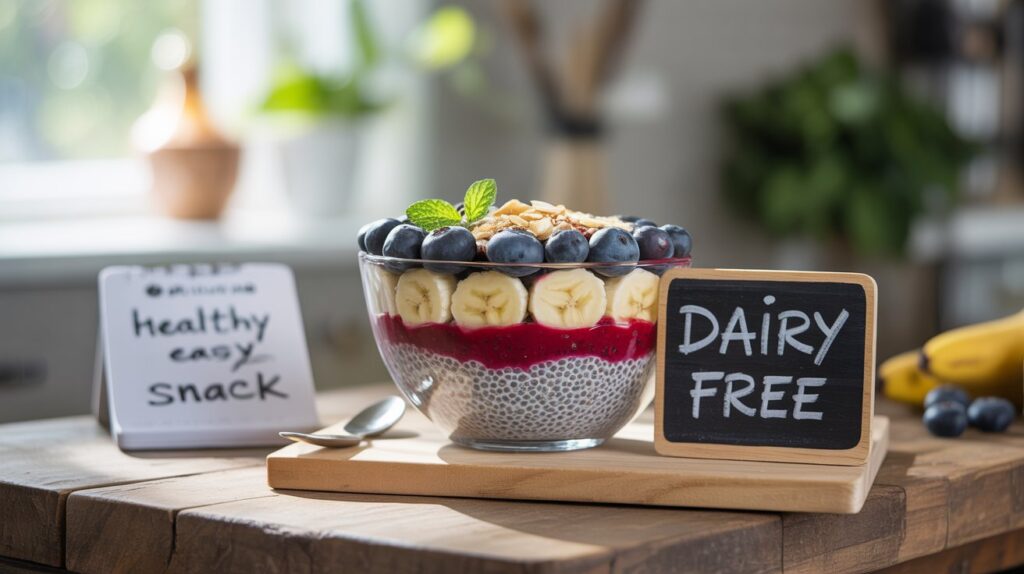
Dairy-free chia pudding is a delightful and nutritious snack that has gained popularity for its simplicity and versatility.
With a creamy texture and a hint of sweetness, this pudding can be customized with a variety of flavors and toppings.
I stumbled upon chia pudding while exploring plant-based diets, and it quickly became a staple in my kitchen.
Whether enjoyed as a breakfast, dessert, or mid-afternoon snack, this chia pudding is not only healthy but also incredibly easy to prepare.
The History and Cultural Significance
• Dairy Free Chia Pudding Recipes traces its origins to Central America, where chia seeds were a staple food of the Aztecs and Mayans.
• The dish evolved over time as more people began to discover the health benefits of chia, leading to its modern interpretations that cater to various dietary preferences.
• In many cultures, chia seeds are celebrated for their high nutritional value, appearing in health food movements and wellness trends.
• While many variations exist across different regions, the authentic version maintains the use of simple ingredients that highlight the natural flavors of chia seeds.
Recipe Overview
Nutritional Information (per serving)
Ingredients
Essential Equipment Guide
Mixing Bowl: A good mixing bowl is essential for combining your chia seeds with the liquid evenly. Look for a bowl that is large enough to allow for thorough mixing without spilling.
Whisk or Spoon: This tool is important for stirring the chia pudding to avoid clumping. A whisk can help incorporate air and create a smoother texture, while a spoon is a reliable alternative.
Measuring Cups and Spoons: Accurate measurements are key to achieving the right consistency. Use standard measuring cups and spoons to ensure you’re using the correct amounts of ingredients.
Preparation Methods
Blooming Chia Seeds: This technique involves mixing chia seeds with liquid and allowing them to sit until they absorb the liquid and swell. This is crucial for achieving the pudding’s signature texture. Make sure to stir occasionally to prevent clumping.
Chilling: After mixing, it’s essential to chill the pudding in the refrigerator for at least 4 hours or overnight. This allows the chia seeds to fully absorb the liquid and thicken the mixture. Cover the bowl to prevent any unwanted odors from the fridge affecting the flavor.
Layering Flavors: When adding toppings or flavorings, think about balancing textures and flavors. Adding fresh fruits, nuts, or spices can elevate the pudding and make it more enjoyable. Experiment with different combinations to find what you love.
Step 1: Gather Ingredients

Start by gathering all your ingredients on a clean countertop.
Ensure you have everything measured out for easy access during preparation.
This will help streamline the process and prevent any last-minute searches.
Take a moment to admire the vibrant colors of your fresh fruits and nuts.
Step 2: Mix Chia Seeds and Liquid

In a mixing bowl, combine the chia seeds and almond milk.
Whisk together until the chia seeds are evenly distributed throughout the liquid.
Make sure there are no clumps of chia seeds, as this will affect the pudding’s texture.
Let the mixture sit for about 5 minutes before whisking again to prevent clumping.
Step 3: Add Sweetener and Flavor

Once the chia seeds have bloomed, add the maple syrup, vanilla extract, and a pinch of salt to the mixture.
Stir well to ensure all ingredients are thoroughly combined.
Taste the mixture and adjust sweetness if needed by adding more maple syrup.
This step allows you to customize the flavor to your liking.
Step 4: Chill the Mixture

Cover the mixing bowl with plastic wrap or transfer the mixture into individual serving jars.
Refrigerate for at least 4 hours, or preferably overnight, to allow the chia seeds to swell and thicken.
The longer it sits, the creamier the texture will become.
This is an excellent time to prepare your toppings.
Step 5: Prepare Toppings

While the pudding is chilling, wash and chop the fresh berries and nuts.
Ensure the fruits are dry to prevent any excess moisture from affecting the pudding.
You can also consider other toppings like coconut flakes or granola for added texture.
Set the toppings aside until the pudding is ready to serve.
Step 6: Serve the Chia Pudding

After the pudding has set, remove it from the refrigerator and give it a gentle stir.
Spoon the pudding into serving bowls or jars, filling each one generously.
Top with your prepared berries, nuts, and any additional toppings you desire.
Consider a drizzle of extra maple syrup on top for an added touch of sweetness.
Step 7: Add Final Touches

For a finishing touch, sprinkle some chia seeds or coconut flakes on top for visual appeal.
You can also add a mint leaf for a pop of color and freshness.
This step enhances not only the look but also the flavor complexity of the dish.
Serve immediately, or keep it in the fridge for later enjoyment.
Step 8: Enjoy Your Snack

Gather your friends or family around to share this delicious treat.
Enjoy the creamy texture and the burst of flavors from the toppings.
Don’t forget to share your experience and any variations you tried!
This pudding makes for a healthy and satisfying snack any time of the day.
Critical Timing and Temperature Guide
Chilling Time: Ensure the pudding chills for at least 4 hours or overnight for the perfect texture. Look for a thickened, creamy consistency. Common mistakes include not allowing enough time for the chia seeds to swell.
Serving Temperature: Serve the pudding chilled to enjoy its refreshing taste. If the pudding is too warm, it may not have set properly. Always check for the right texture before serving.
Mixing: Properly mixing the ingredients is crucial to avoid lumps. Stir well after the initial 5 minutes and before chilling. A common mistake is to skip this step, leading to an uneven texture.
Pro Tips for Dairy Free Chia Pudding Recipes
• Ingredient Selection: Choose high-quality almond milk for a rich flavor that enhances the pudding.
• Preparation Secret: Whisking the mixture multiple times helps achieve a smooth texture.
• Temperature Management: Ensure your almond milk is at room temperature for better mixing.
• Texture Enhancement: Use a blender for an ultra-smooth pudding if you prefer a finer consistency.
• Flavor Layering: Experiment with spices like cinnamon or cocoa powder for unique flavors.
• Make-Ahead Strategies: Prepare the base mixture the night before to save time.
• Restaurant-Quality Finishing Touches: Garnish with edible flowers for an elegant presentation.
• Equipment Optimization: Use a glass jar for serving to showcase the beautiful layers of the pudding.
Troubleshooting Common Issues
• Too Watery: This often occurs if not enough chia seeds are used. To fix, add more chia seeds and let it sit longer.
• Clumpy Texture: This happens if chia seeds weren’t stirred well after mixing. To avoid, ensure thorough mixing and whisk again after a few minutes.
• Overly Sweet: If the pudding is too sweet, add a pinch of salt to balance the flavors. Next time, reduce the sweetener.
• Flavorless: To enhance flavor, consider adding extracts or spices. Adjust based on personal taste preferences.
• Not Thickening: Insufficient chilling time can lead to a runny pudding. Ensure it sets in the fridge for at least 4 hours or overnight.
Variations and Regional Differences
• Chocolate Chia Pudding: This variation uses cocoa powder for a rich, chocolatey flavor, perfect for dessert lovers. Combine cocoa with the base ingredients for a delightful twist.
• Tropical Chia Pudding: Incorporate coconut milk and top with mango and pineapple for a refreshing, tropical experience. This version is excellent for summer gatherings.
• Spiced Chia Pudding: Adding cinnamon and nutmeg gives warmth to the pudding, making it ideal for fall.
• Modern Interpretations: Today, many create chia pudding parfaits with layers of yogurt, fruit, and granola, adding a trendy touch to this classic recipe.
Food Science Behind the Recipe
• Hydrophilic Properties of Chia Seeds: Chia seeds can absorb up to 12 times their weight in liquid, creating the pudding’s unique texture. Understanding this property ensures proper ratios for desired consistency.
• Gel Formation: When chia seeds are mixed with liquid, they form a gel-like substance. This is crucial for achieving the pudding’s creamy texture, and it’s important to allow sufficient time for this process.
• Emulsification: The mixing of chia seeds with liquid demonstrates emulsification, where disparate ingredients combine for a uniform mixture. Mastering this technique is key to preventing clumps.
Frequently Asked Questions
What’s the most common mistake people make when preparing chia pudding? The top mistake is not allowing enough time for the chia seeds to absorb the liquid, resulting in a runny texture. Always let it sit for at least 4 hours.
Can I prepare components of this dish in advance? Yes, you can prepare the chia pudding base a day ahead and store it in the refrigerator. Toppings can also be prepped in advance.
How do I adapt this recipe for dietary restrictions? For nut allergies, substitute almond milk with oat milk or coconut milk. Adjust sweetness with alternative sweeteners if needed.
What’s the best way to store and reheat leftovers? Store any leftovers in an airtight container in the fridge for up to 3 days. Do not reheat; enjoy chilled instead.
Can I freeze this dish? Yes, you can freeze chia pudding for up to 2 months. Thaw in the fridge overnight before serving.
What wine or beverages pair best with this dish? Light, fruity wines or herbal teas complement the fresh flavors of chia pudding beautifully.
How can I scale this recipe up for a crowd? Simply multiply the ingredient amounts by the number of servings needed while ensuring a large enough mixing bowl for preparation.
What side dishes complement this recipe best? Fresh fruit salad or granola pairs wonderfully, adding texture and flavor to the meal.
How do professional chefs elevate this dish for restaurant service? Chefs often serve chia pudding in clear glass jars with artistic layering and garnishes, enhancing the dining experience.
Serving and Presentation Guide
• Traditional Presentation: Serve chia pudding in clear glass cups to showcase the layers of pudding and toppings. Garnish with a sprig of mint and a drizzle of syrup for elegance.
• Modern Plating Ideas: Use bowls with artistic designs and layer the pudding with fruits and nuts for a contemporary feel. Consider using edible flowers for a pop of color.
• Accompaniment Suggestions: Pair with herbal tea or fresh juices to enhance the lightness of the dish. A sprinkle of cinnamon can also add an aromatic touch.
• Special Occasion Presentation: For festive gatherings, serve in mini jars with personalized labels and ribbons for a charming touch.
Conclusion
I hope you find joy in making this dairy-free chia pudding as much as I do.
It’s a simple yet delicious way to incorporate healthy ingredients into your diet.
Don’t hesitate to experiment with flavors and toppings to make it your own.