The KitchenAid Ice Cream Maker Recipes Dairy Free and Creamy offers a delightful way to enjoy frozen desserts without the dairy.
With a luscious texture and vibrant flavors, this ice cream is sure to please both dairy lovers and those avoiding dairy products.
I first experimented with dairy-free ice cream during a hot summer day, craving something cool and refreshing yet guilt-free.
Whether you’re enjoying a scoop on a warm evening or serving it at a gathering, this recipe is an excellent choice for everyone to savor.
The History and Cultural Significance
• KitchenAid Ice Cream Maker Recipes Dairy Free And Creamy traces its origins to the rise of non-dairy alternatives in the 21st century, driven by dietary preferences and health trends.
• The dish evolved over decades as ingredients like coconut milk, almond milk, and cashew cream gained popularity, eventually becoming a staple for those seeking indulgent yet healthier desserts.
• In many cultures, ice cream is a symbol of celebration, often enjoyed during summer festivals or family gatherings, representing joy and togetherness.
• While many variations exist across different countries, the authentic dairy-free ice cream retains a creamy texture and rich flavor that distinguishes it from traditional versions.
Recipe Overview
Nutritional Information (per serving)


Ingredients


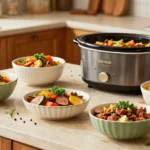
Essential Equipment Guide
KitchenAid Ice Cream Maker Attachment: This attachment is crucial for creating that smooth, creamy texture in your ice cream. Look for models compatible with your KitchenAid mixer, as this will ensure optimal performance.
Blender or Food Processor: A high-powered blender or food processor is essential for blending the base ingredients to a smooth consistency. Ensure it has a strong motor to handle thick mixtures like frozen fruit or nut bases.
Storage Containers: Airtight containers are important for storing your ice cream in the freezer. Choose durable, freezer-safe materials that can withstand temperature changes.


Preparation Methods
Chilling the Base: Before churning, it’s essential to chill the ice cream base for at least 2-4 hours in the refrigerator. This step ensures a smoother texture and allows the flavors to meld together.
Blending Ingredients: Use a high-speed blender to combine the coconut milk, almond milk, maple syrup, and vanilla extract until smooth. This technique helps to achieve a creamy consistency, which is key for a delightful ice cream.
Churning: Once the base is chilled, pour it into the KitchenAid ice cream maker attachment and churn according to the manufacturer’s instructions. This process aerates the ice cream, creating that light and fluffy texture.


Step 1: Prepare Ingredients

Gather all your ingredients and ensure they are at room temperature.
Measure out the coconut milk, almond milk, maple syrup, and vanilla extract carefully.
Chop any fresh fruit you plan to add, ensuring they are bite-sized for easy incorporation.
Having everything ready will make the blending process smoother.
Step 2: Blend the Base

In a high-speed blender, combine the coconut milk, almond milk, maple syrup, and vanilla extract.
Blend on high until the mixture is completely smooth and well combined.
Ensure there are no lumps, as a smooth base is crucial for achieving a creamy ice cream texture.
Taste the mixture to check for sweetness and adjust if necessary.
Step 3: Chill the Mixture

Transfer the blended mixture into a bowl or container, then cover it with plastic wrap.
Place the container in the refrigerator and let it chill for at least 2-4 hours, or until thoroughly cold.
This chilling step is essential for a smoother texture when churning.
If you’re short on time, you can place it in the freezer for about 30-60 minutes, checking frequently.
Step 4: Prepare the Ice Cream Maker

Attach the KitchenAid Ice Cream Maker to your mixer according to the manufacturer’s instructions.
Make sure the bowl is frozen solid, usually for at least 15 hours prior to use.
This ensures that the ice cream will freeze quickly and achieve the right texture.
Set up your mixer in a stable position to avoid any spills during the churning process.
Step 5: Churn the Ice Cream

Pour the chilled mixture into the ice cream maker while it is running on low speed.
Churn according to the manufacturer’s instructions, typically about 20-30 minutes.
Watch for the mixture to thicken and increase in volume, indicating it’s turning into ice cream.
Avoid over-churning, which can lead to a grainy texture.
Step 6: Add Mix-ins

When the ice cream has thickened, slowly add any mix-ins like fresh fruit or chocolate chips.
Use a spatula to gently incorporate them without over-mixing.
This will maintain the structure of the ice cream while adding delicious bursts of flavor.
Churn for another 2-3 minutes to evenly distribute the mix-ins.


Step 7: Transfer to Storage Container

Once the ice cream has reached a soft-serve consistency, carefully transfer it to an airtight storage container.
Use a spatula to smooth the top of the ice cream for even freezing.
Seal the container tightly to prevent ice crystals from forming.
This step is crucial for maintaining the ice cream’s texture in the freezer.
Step 8: Freeze Until Firm

Place the container in the freezer and allow the ice cream to firm up for at least 4 hours.
This final freezing step is essential to achieving the perfect scoopable texture.
Check after a few hours to ensure it is freezing evenly.
If the ice cream is too soft, allow it to freeze longer before serving.
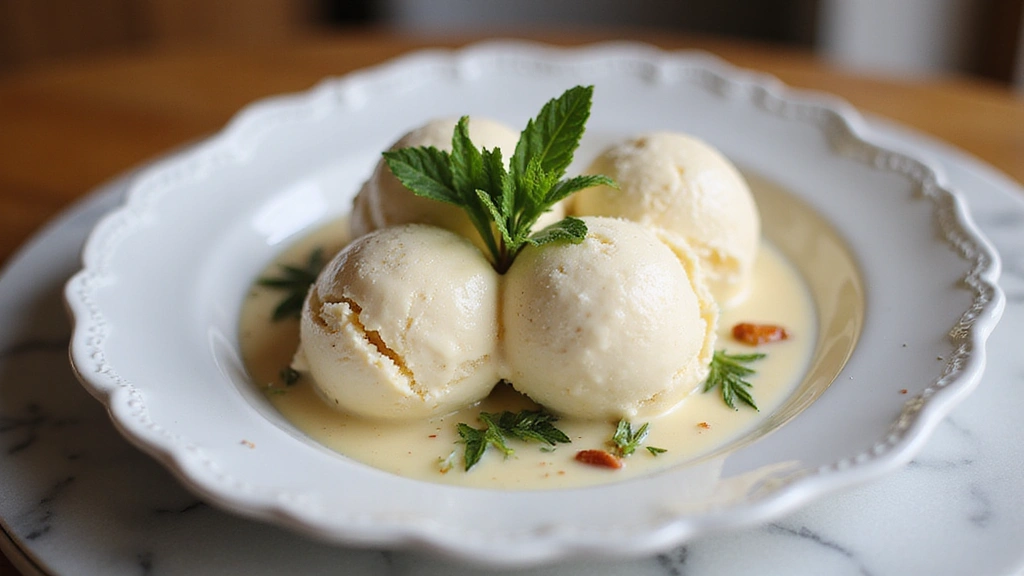
Step 9: Scoop and Serve

Once the ice cream is fully frozen, use an ice cream scoop to serve into bowls or cones.
If the ice cream is too hard, let it sit at room temperature for a few minutes to soften slightly.
Garnish with additional fresh fruit, nuts, or a drizzle of chocolate sauce for added flair.
Enjoy your homemade dairy-free ice cream with family and friends!
Critical Timing and Temperature Guide
Chilling the Ice Cream Base: Chill the mixture for 2-4 hours at 40°F or lower to ensure a creamy texture. Avoid skipping this step as it can lead to a grainy finish.
Churning Time: Churn for about 20-30 minutes, watching for thickening; it should increase in volume and hold soft peaks. Over-churning can lead to a texture that is too firm.
Freezing Time: Allow the ice cream to freeze for at least 4 hours at 0°F or lower to achieve the perfect scoopable consistency. Check periodically to ensure it is freezing evenly.
Pro Tips for Kitchenaid Ice Cream Maker Recipes Dairy Free And Creamy
• Ingredient Selection: Use high-quality coconut and almond milk for the best flavor and creaminess.
• Preparation Secret: Blend the base ingredients for longer to achieve an ultra-smooth texture.
• Temperature Management: Ensure all ingredients are cold before blending for optimal results.
• Texture Enhancement: Consider adding a small amount of vodka to the base to prevent ice crystals and enhance creaminess.
• Flavor Layering: Add spices like cinnamon or nutmeg for subtle depth in flavor.
• Make-Ahead Strategies: Prepare the base the night before and chill overnight for the best results.
• Restaurant-Quality Finishing Touches: Serve with homemade sauces or toppings for an elevated presentation.
• Equipment Optimization: Keep the ice cream maker bowl in the freezer at all times for spontaneous ice cream cravings.
Troubleshooting Common Issues
• Texture Too Dense: This can occur from over-churning. To fix, allow it to soften at room temperature before serving and observe churning times closely in the future.
• Ice Crystals Forming: This happens due to improper sealing during storage. Ensure your container is airtight and consider covering with plastic wrap before sealing it.
• Flavor Too Mild: If the flavor isn’t strong enough, consider adding more extract or spices during blending. Always taste the mixture before chilling.
• Too Sweet: If the mixture is overly sweet, balance it by adding a pinch of salt and adjusting the quantity of sweetener next time.
• Ice Cream Doesn’t Freeze Properly: Ensure the ice cream maker bowl is fully frozen prior to use. If not, freeze it longer before starting the churning process.
Variations and Regional Differences
• Matcha Green Tea Variation: Add 2 tablespoons of matcha powder to the base for a unique flavor profile that is both earthy and refreshing.
• Chocolate Avocado Ice Cream: Use ripe avocados blended into the base for a rich, creamy chocolate ice cream. Replace some of the coconut milk with avocado for added texture.
• Spiced Chai Ice Cream: Infuse the base with chai spices like cinnamon, ginger, and cardamom for a warm and fragrant twist.
• Modern Interpretations: Experiment with flavors like lavender or rosemary for a contemporary touch that maintains the essence of traditional ice cream.
Food Science Behind the Recipe
• Emulsification: The blending of fats and water creates a stable mixture that results in a smooth texture. Understanding emulsification helps to prevent separation in your ice cream base.
• Freezing Point Depression: Sugar lowers the freezing point of the mixture, allowing the ice cream to remain soft and scoopable. Balancing sugar levels is key for achieving the desired consistency.
• Air Incorporation: Churning introduces air into the mixture, creating a light and fluffy texture. The right amount of churning time is vital to prevent over-aeration.
Frequently Asked Questions
What’s the most common mistake people make when preparing dairy-free ice cream? Not chilling the base long enough before churning can lead to poor texture. Always ensure it is thoroughly cold.
Can I prepare components of this dish in advance? Yes, the ice cream base can be made the night before and stored in the refrigerator. It’s best to chill it overnight for optimal flavor.
How do I adapt this recipe for dietary restrictions? For nut-free versions, use oat milk or rice milk instead of almond milk. Adjust the quantities as needed for the best flavor.
What’s the best way to store and reheat leftovers? Store in an airtight container in the freezer for up to 2 weeks. Allow to soften at room temperature before scooping.
Can I freeze this dish? Yes, it freezes well. Ensure it is stored in an airtight container to maintain texture and flavor.
What wine or beverages pair best with this dish? Light wines like Moscato or fruity beverages complement the sweetness and refreshing nature of the ice cream.
How can I scale this recipe up for a crowd? Double the ingredients while ensuring your ice cream maker is large enough to handle the increased volume, or churn in batches.
What side dishes complement this recipe best? Fresh fruit salads or light pastries pair excellently with the richness of the ice cream.
How do professional chefs elevate this dish for restaurant service? By incorporating unique flavors and textures, such as pairing the ice cream with gourmet sauces or unexpected toppings.
Serving and Presentation Guide
• Traditional Presentation: Serve in chilled dessert bowls with a sprig of fresh mint and a drizzle of fruit sauce for an authentic touch.
• Modern Plating Ideas: Use a slate board for a contemporary look, garnishing with edible flowers and colorful fruit for visual appeal.
• Accompaniment Suggestions: Pair with homemade cookies or a light dessert like sorbet for a refreshing contrast.
• Special Occasion Presentation: Create an ice cream sundae bar with various toppings and sauces for an interactive experience at gatherings.
Conclusion
I hope this recipe inspires you to create your own delicious dairy-free ice cream.
It’s a refreshing treat that can be customized to suit any palate.
Dive into this creamy delight, and relish every scoop with your loved ones.