
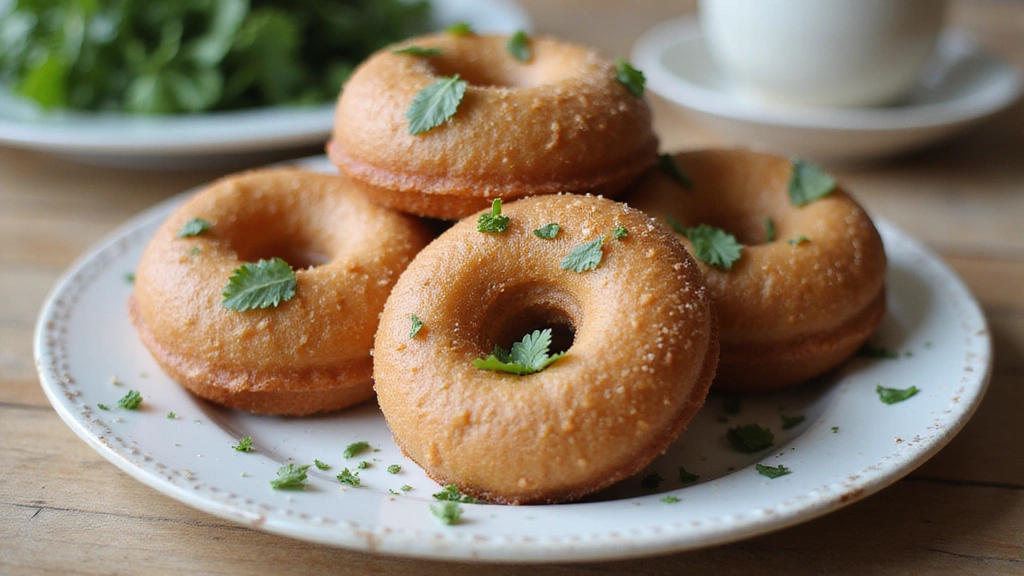
These gluten and dairy free donuts are a delightful treat that everyone can enjoy.
With a light and fluffy texture, they boast a perfect balance of sweetness and flavor.
I first encountered this recipe while searching for healthier dessert options, and I was amazed at how satisfying they are without traditional ingredients.
Ideal for breakfast or a sweet snack, these homemade donuts are sure to brighten your day!
The History and Cultural Significance
• Gluten And Dairy Free Donut Recipes Sweet Homemade Treat traces its origins to the rise of gluten-free diets in the early 21st century, where it was originally created by health-conscious bakers.
• The dish evolved over decades as alternative flours and dairy substitutes became more accessible, eventually becoming the beloved version we know today.
• In modern health-focused cultures, this dish traditionally appears at brunch gatherings and celebrations, symbolizing inclusivity and indulgence without dietary restrictions.
• While many variations exist across different regions, the authentic version maintains a light texture and sweet flavor that sets it apart from imitations.
Recipe Overview
Nutritional Information (per serving)
Ingredients
Essential Equipment Guide
Donut Pan: A non-stick donut pan is crucial for achieving the perfect shape and texture. Look for a pan made of durable material that can withstand high temperatures and has a non-stick coating for easy release.
Mixing Bowls: A set of mixing bowls in various sizes is important for measuring and combining ingredients effectively. Opt for bowls that are microwave-safe and easy to clean, preferably with a non-slip base for stability.
Whisk: A good whisk is essential for thoroughly mixing the wet and dry ingredients to ensure a smooth batter. Choose a whisk with a comfortable grip and durable wires that can handle different types of mixtures.
Preparation Methods
Mixing Ingredients: Mixing ingredients properly is crucial to achieving a uniform batter. Always start with dry ingredients and gradually incorporate wet ingredients to prevent clumping. Use a whisk or spatula to combine until just mixed, being careful not to overmix, which can lead to dense donuts.
Filling the Donut Pan: When filling the donut pan, use a piping bag or a spoon for neatness. Fill each cavity about three-quarters full to allow room for rising. A neat filling helps create perfect shapes and avoids messy overflow during baking.
Glazing: For glazing the donuts, ensure they are slightly warm but not hot to maintain the glaze’s consistency. Dip the top of each donut into the glaze and allow excess to drip off. Letting them cool slightly before glazing will help the glaze adhere better.
Step 1: Prepare Ingredients

Begin by gathering all your ingredients on a clean workspace.
Measure out the almond flour, gluten-free flour, baking powder, and baking soda into separate bowls.
This organization will help streamline the mixing process.
Ensure all ingredients are at room temperature for better incorporation.
Step 2: Mix Dry Ingredients

In a large mixing bowl, sift together the almond flour, gluten-free flour, baking powder, and baking soda.
Sifting helps to aerate the flour and eliminates any lumps, resulting in a lighter donut.
Use a whisk to combine thoroughly until no dry streaks remain.
This step is crucial for achieving a uniform texture in the donuts.
Step 3: Mix Wet Ingredients

In another bowl, combine the maple syrup, applesauce, melted coconut oil, and vanilla extract.
Stir well until the mixture is smooth and homogenous.
This ensures that the flavors are evenly distributed throughout the batter.
It’s important that the coconut oil is not too hot to avoid cooking the applesauce.
Step 4: Combine Wet and Dry Ingredients

Add the wet mixture to the dry ingredients in the large mixing bowl.
Gently fold the ingredients together using a spatula or wooden spoon until just combined.
Be careful not to overmix, as this can affect the donuts’ texture.
The batter should be slightly thick but pourable.
Step 5: Fill the Donut Pan

Preheat your oven to 350°F (175°C) while you prepare the donut pan.
Use a piping bag or spoon to fill each cavity of the donut pan about three-quarters full with batter.
This will allow room for the donuts to rise without overflowing.
Ensure the batter is evenly distributed for uniform cooking.
Step 6: Bake the Donuts

Place the filled donut pan into the preheated oven and bake for 15-20 minutes.
The donuts are done when they are golden brown and a toothpick inserted into the center comes out clean.
Keep an eye on them to avoid overbaking, which can lead to dryness.
Let them cool in the pan for a few minutes before transferring to a wire rack.
Step 7: Prepare the Glaze

While the donuts are cooling, prepare the glaze by whisking together the powdered sugar, almond milk, and vanilla extract in a bowl.
Adjust the consistency by adding more almond milk if it’s too thick, or more powdered sugar if too thin.
The glaze should be smooth and pourable.
Set aside until the donuts are completely cooled.
Step 8: Glaze the Donuts

Once the donuts have cooled slightly, dip the top of each donut into the glaze.
Allow any excess glaze to drip off before placing them back on the wire rack.
This step will give the donuts a beautiful finish and enhance their sweetness.
You can also add toppings like sprinkles or nuts at this stage.
Critical Timing and Temperature Guide
Baking Time: Bake the donuts for 15-20 minutes at 350°F (175°C). Look for a golden brown color and a toothpick inserted into the center should come out clean. Avoid opening the oven door frequently to maintain temperature.
Cooling Time: Allow the donuts to cool in the pan for 5 minutes before transferring to a wire rack. This helps them set and prevents them from breaking apart. Ensure they are fully cooled before glazing, as hot donuts can cause the glaze to run off.
Glaze Consistency: The glaze should be smooth and pourable. If it’s too thick, add a teaspoon of almond milk at a time until the desired consistency is reached. If it’s too thin, incorporate more powdered sugar to thicken.
Pro Tips for Gluten And Dairy Free Donut Recipes Sweet Homemade Treat
• Ingredient Selection: Use high-quality almond flour for a richer flavor and better texture. Look for finely ground almond flour rather than almond meal for optimal results.
• Preparation Secret: Allow your wet ingredients to come to room temperature. This helps create a smoother batter and better incorporation.
• Temperature Management: Preheat your oven properly to ensure even baking. An oven thermometer can help verify actual temperature accuracy.
• Texture Enhancement: To achieve a light texture, avoid overmixing the batter once combined. This keeps the donuts fluffy.
• Flavor Layering: Incorporate spices such as cinnamon or nutmeg into your batter for added depth of flavor.
• Make-Ahead Strategies: The donut batter can be prepared in advance and stored in the refrigerator for up to 24 hours.
• Restaurant-Quality Finishing Touches: Drizzle melted dairy-free chocolate over the glazed donuts for an elegant touch.
• Equipment Optimization: Ensure your donut pan is well-greased or use a non-stick spray for easy release.
Troubleshooting Common Issues
• Texture Too Dense: This can occur from overmixing the batter or using too much flour. To fix it, ensure you measure ingredients accurately and mix just until combined.
• Donuts Not Rising: If your donuts don’t rise, check if your baking powder is fresh. Aging leavening agents can lose their effectiveness. Replace if necessary.
• Glaze Not Sticking: If the glaze runs off, the donuts may be too warm. Allow them to cool completely before glazing.
• Flavor Too Bland: Enhance the flavor by adding more vanilla extract or spices. Taste the batter before baking to adjust sweetness.
• Donuts Overbaked: If they come out dry, reduce baking time slightly. Keep a close watch in the last few minutes of baking.
Variations and Regional Differences
• Baked vs. Fried: Traditional donuts are often fried for a richer flavor, while this recipe is baked for a healthier alternative. Baked donuts are lighter and less greasy.
• Chocolate Donuts: Adding cocoa powder to the dry ingredients transforms these into chocolate donuts. Adjust the sweetness accordingly to balance the cocoa’s bitterness.
• Spiced Pumpkin Donuts: Incorporate pumpkin puree and fall spices like cinnamon and nutmeg for a seasonal twist.
• Modern Interpretations: With the rise of plant-based diets, many recipes now incorporate alternative sweeteners and flours, like coconut sugar or oat flour, for a contemporary take.
Food Science Behind the Recipe
• Gluten-Free Baking: In gluten-free baking, alternative flours provide structure and moisture. Understanding the properties of each flour helps in achieving the desired texture.
• Coconut Oil Solidification: Coconut oil can solidify when mixed with cold ingredients. This can affect the batter’s texture, so ensure all ingredients are at room temperature.
• Leavening Agents: Baking powder and baking soda create carbon dioxide when activated by moisture and heat. This reaction is what helps the donuts rise and develop a light texture.
Frequently Asked Questions
What’s the most common mistake people make when preparing gluten and dairy free donuts? The most common mistake is overmixing the batter, which can lead to dense donuts. Mix just until combined for the best texture.
Can I prepare components of this dish in advance? Yes, you can prepare the batter ahead of time and store it in the refrigerator for up to 24 hours before baking. Just stir well before using.
How do I adapt this recipe for dietary restrictions? For nut allergies, substitute almond flour with oat flour or a gluten-free blend. Ensure all other ingredients are also free of allergens.
What’s the best way to store and reheat leftovers? Store leftovers in an airtight container at room temperature for up to 2 days. To reheat, place in a microwave for a few seconds to warm slightly.
Can I freeze this dish? Yes, you can freeze the donuts for up to 3 months. Wrap each donut individually in plastic wrap and place them in a freezer bag.
What wine or beverages pair best with this dish? Pair with a light-bodied coffee or a glass of sparkling water for a refreshing contrast.
How can I scale this recipe up for a crowd? Simply double or triple the ingredient amounts and bake in batches if necessary, adjusting baking time as needed.
What side dishes complement this recipe best? Fresh fruit or a yogurt parfait can complement the sweetness of the donuts well.
How do professional chefs elevate this dish for restaurant service? Professional chefs often use flavor-infused glazes or unique toppings like candied citrus or edible flowers for a gourmet touch.
Serving and Presentation Guide
• Traditional Presentation: Serve donuts on a tiered cake stand for a classic display. Dust with powdered sugar or drizzle glaze artistically on top.
• Modern Plating Ideas: Arrange donuts on a wooden board with fresh fruit or flowers around them for a rustic look.
• Accompaniment Suggestions: Pair with a side of fresh berries or a scoop of dairy-free ice cream for an indulgent dessert.
• Special Occasion Presentation: For special events, consider garnishing with edible flowers or drizzling with gourmet chocolate for an elegant touch.
Conclusion
These gluten and dairy free donuts are a delicious way to satisfy your sweet tooth without compromising on health.
I encourage you to try this recipe and tailor it to your taste preferences.
Sharing these with friends and family will surely bring smiles to their faces.
Enjoy your baking adventure and the delightful treats that follow!