Did you know that 73% of homeowners say molding makes their dining rooms spaces where they actually want to gather?
I’ve found that the right molding choices—from asymmetric heights to strategic color—can completely reshape how your room feels and functions.
Whether you’re working with tight corners or framing doorways, there’s a technique that’ll make your walls look professionally finished. Here’s what you need to know.
Asymmetric Molding Heights for Visual Interest and Dimension
While traditional molding relies on uniform heights, asymmetric molding, which uses uneven vertical spacing instead, creates a dynamic, luxurious look that makes an ordinary dining room wall distinctive. Combining upper, middle, and bottom frames produces varied proportions that catch the eye and add dimension.
The beauty of asymmetric molding heights lies in their strategic placement. Higher portions enhance ceiling height perception, making your dining room feel more spacious. Lower elements anchor furniture and artwork, grounding the space beautifully. Products like the Birdeco Asymmetric Wall Molding Kit offer pre-cut, factory-primed pieces designed for easy customization.
Using a laser level mapping approach achieves professional alignment. You’ll get that high-end, elegant finish that makes your dining room feel carefully designed, a space where you and your guests truly belong.
Color Variation in Dining Molding to Define Zones

When you paint your molding in a different color than your walls, you’re creating visual contrast that naturally separates your dining space from the rest of your home. A darker molding against lighter walls, like charcoal framing soft ivory, instantly adds sophistication and depth.
You can use accent walls with molding to carve out distinct zones, painting upper frames in one hue and lower frames in another to emphasize your room’s architectural lines and create that tailored, thoughtful appearance. The key painting technique is keeping your color choices complementary rather than clashing, so a muted gray molding against warm white walls maintains unity while still delivering that elegant definition you’re after.
Contrast Creates Visual Impact
How can you redesign your dining room with just a paint brush and the right color choices? Contrast is your hidden tool. I’ve found that pairing lighter walls with darker molding, such as warm white walls paired with charcoal trim, creates dramatic visual impact. This approach highlights your architectural details, making crown moldings and chair rails feel purposeful and elegant.
You don’t need overwhelming colors. A two-tone strategy keeps things sophisticated: neutral walls with bold accent molding draws the eye without chaos. The contrast guides attention around your dining area, emphasizing vertical rhythm and creating a defined zone that feels organized.
The key? Make sure there’s sufficient contrast between your choices. When colors work together, your dining space feels polished, luxurious, and purposefully designed, proving that thoughtful color decisions improve any room.
Accent Walls With Molding
Why settle for a one-note dining room when molding can help you carve out distinct zones? Accent wall molding creates elegant visual boundaries that separate your dining area from adjacent rooms. I’ve found that strategic color choices matter significantly in achieving this effect.
Consider these approaches:
- Paint your accent wall in a complementary color to your dining chairs, then frame it with contrasting molding that echoes your table’s tone
- Use two-tone molding with a lighter crown and darker lower rails to highlight architectural depth
- Apply stained or painted color differences on individual molding sections to delineate a dedicated dining nook
This design strategy makes your molding feel purposeful rather than decorative, establishing a luxurious gathering space that invites connection.
Painting Techniques For Definition
Color variation on your molding does the substantial work that accent wall colors alone can’t achieve. I’ve found that painting the outer edges or risers a slightly different shade than the face creates elegant depth and definition. Two-tone molding, where recessed sections feature a contrasting hue, like white molding with pale gray shadows, highlights joints beautifully and draws the eye around your dining space.
You can also apply glazing or antiquing techniques to recessed details, enhancing definition without changing your base wall color. The key is testing these color variations on sample boards within your actual dining room, observing how natural and incandescent lighting affects them throughout the day. This approach maintains defined zones consistently, creating that sophisticated, deliberate appearance you’re after.
Tight Corners and Joints for a Polished, Custom Finish

When I tackle tight corners and joints in dining room molding, I’ve found that precision cutting and seamless installation techniques are what separate a polished, custom look from an amateur finish. You’ll want to use laser level mapping to ensure exact alignment where walls meet, paired with pre-cut, labeled pieces that fit together like puzzle parts without gaps.
I recommend considering custom design services or peel-and-stick kits for those tricky spaces, then finishing with paint to blend everything smoothly into one elegant, unified design.
Precision Cutting and Fit
Getting those tight corners and seamless joints right is what separates a custom, luxury look from an amateur installation. I’ve learned that precision cutting is absolutely required for achieving that polished finish you’re after.
Here’s what makes the difference:
- Pre-cut, labeled pieces arrive factory-primed and ready to fit perfectly, eliminating guesswork and gaps
- Multiple measurements of your space catch irregular wall angles that standard kits simply miss
- Laser level mapping aligns corners and frame intersections with accuracy, producing professional results
When you invest in custom-cut molding rather than ready-made kits, you’re choosing seamless transitions over visible gaps. The tight joints mean minimal filling or repainting later.
Your dining room gains that elegant, intentional appearance that tells guests you’ve paid attention to every detail.
Seamless Installation Techniques
How do you create a luxurious, built-in look that makes your dining room feel carefully planned? The answer lies in seamless installation techniques. Start by using a laser level to map your walls precisely, ensuring tight corners where molding meets surfaces. I recommend taking multiple measurements before you begin; this prevents misalignment and costly mistakes.
Consider custom design services that provide pre-cut, factory-primed pieces with labeled templates. These eliminate guesswork around corners and recesses. While peel-and-stick kits offer speed, traditional ready-made options paired with careful planning deliver superior results. The key? Those tight seams where joints connect create that polished, carefully planned finish you’re after. Your dining room will feel custom-crafted, not off-the-shelf.
Frame Windows and Doorways to Anchor the Room’s Design

Framing your windows and doorways with molding is one of the smartest ways I’ve found to give your dining room a polished, architectural feel. This frame molding creates visual anchors that draw the eye inward, centering your space beautifully.
Here’s what makes this approach so effective:
- Pre-cut, labeled pieces from kits like Birdeco ensure clean joints with minimal gaps
- Laser level guidance helps you achieve precise alignment around every opening
- Customizable cuts accommodate your exact window and door dimensions
When you select frame molding with upper, middle, and bottom components, you’re investing in professional-looking results without the complexity. Coordinating this treatment with nearby wall paneling creates cohesion throughout your dining area. You’ll love how this elegant detail turns ordinary openings into architectural centerpieces that give your entire room greater sophistication and purposeful design.
Align Molding Heights for Visual Continuity

Once you’ve framed your windows and doorways, the next critical step is aligning all your molding at consistent heights throughout the dining room. I’ve found that establishing a single baseline for your crown, chair rail, and panel moldings creates an elegant rhythm that guides your eye smoothly around the space.
You’ll want to mark a horizontal guide at your chosen height before cutting any pieces. This prevents misalignments later and allows for precision work.
| Design Element | Height Strategy |
|---|---|
| Crown molding | 8-10 feet from floor |
| Chair rail | 32-36 inches from floor |
| Panel molding | Varies by room proportions |
Consider matching these molding heights to your furniture, like sideboards or cabinets. This integrated approach feels well-planned and refined, creating a dining area with visual balance and harmony.
Strategic Lighting Highlights Your Molding Details

The right lighting showcases your molding as an impressive architectural feature that captures attention and creates depth. I’ve found that strategic lighting enhances your dining room’s elegance by highlighting the craftsmanship you’ve invested in.
Consider these lighting approaches:
- Wall-mounted picture lights or slim LED strips positioned just above or below your molding gently illuminate texture without overwhelming the space
- A dimmable chandelier centered over your dining table creates focal points that draw the eye upward, highlighting your molding’s pattern
- Adjustable spotlights at corners showcase joints and treatments, enhancing perceived craftsmanship
Choose warm white bulbs (2700–3000K) to complement your primed-and-painted molding, achieving that polished, high-end look. Layered lighting allows you to control ambiance while emphasizing architectural details that make your space feel refined and well-designed.
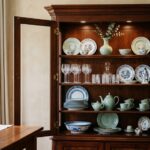
Match Molding to Cabinetry for a Unified Look

How can you make your dining room feel intentionally designed rather than assembled from random pieces? I’d match your molding to your cabinetry. When you’re matching texturing to cabinetry, you’re creating visual harmony that connects everything together beautifully.
Start by choosing molding with the same profile and finish as your cabinets, like a clean, modern design from the Asymmetric Wall Molding Kit. Install it at the same height as your cabinet crown, so lines align perfectly across walls and storage. This creates that seamless, elegant transition you’re after.
Next, select a paint or stain color that mirrors your cabinet finish. This reinforcement strengthens your room’s unified appearance.
Consider pre-cut molding sets with labeled pieces and precise cuts. They allow accurate alignment around existing cabinetry, making installation straightforward. You’ll achieve that polished, well-planned look you deserve.
Map Your Design Vision to Birdeco’s Dining Room Kits

Ready to redesign your dining room with molding that’s perfectly tailored to your space? I’ll help you map your design vision using Birdeco’s specialized kits.
Ready to redesign your dining room with molding perfectly tailored to your space using Birdeco’s specialized kits.
Start by gathering your inspiration image and measuring your wall height and width, excluding crown molding and baseboards. You’ll receive design concepts the same day, so your dining room molding matches your style preferences.
Consider these three options:
- Custom Design Service with precise cut-to-measure pieces labeled for exact fit
- Pre-cut Asymmetric Wall Molding Kits in Modern, Herringbone, or Contemporary styles
- Peel-and-Stick Wall Molding Kit for fast, tool-free installation
Use laser-level mapping for accuracy during planning. This approach creates an elegant, unified space that reflects your personal style while simplifying the installation process.
Get Your Measurements Right the First Time

Why do so many DIY projects go sideways? Skipped measurements. I can’t stress this enough: getting your measurements right creates a polished dining room instead of an amateur one.
I take multiple wall height and width readings from different spots, excluding crown molding and baseboards. Walls aren’t perfectly straight, and I’ve learned this the hard way. I use a laser level or chalk line to map horizontal reference points, ensuring precise alignment across the entire wall.
I record exact measurements for each section, noting doorways and electrical outlets. This planning prevents costly mistakes during installation. I double-check everything against my chosen kit’s layout options, accounting for design repeats or symmetry.
Custom-cut, labeled pieces? They’re worth it. You’ll reduce on-site adjustments and achieve that elegant, luxurious result you’re envisioning. Precision pays off.
From Bare Walls to Custom-Designed Elegance

Transforming your bare dining room walls into a space that looks like you hired a professional designer is entirely possible with the right molding kit. Birdeco’s asymmetric wall molding kits deliver custom millwork elegance without the hefty price tag or lengthy installation process.
Here’s what you’ll experience:
- Pre-cut, factory-primed pieces that arrive ready for your personal paint choices
- Multiple design options: Contemporary, Modern Design, and Herringbone patterns to match your style
- Labeled components with templates and optional laser-level mapping for confident installation
The transformation happens quickly. You’re not stuck with bare walls anymore. Instead, you’re creating that luxurious, high-end finish that makes your dining room feel polished and deliberate.
Custom design services ensure your walls receive perfectly measured cuts tailored to your space. From approximately $108 to $600, these kits prove that elegant dining rooms aren’t just for those with unlimited budgets.