More than half of homeowners now prefer open-plan layouts for their living spaces.
I’m here to show you how to redesign yours from feeling disconnected into something truly luxurious and unified.
The key isn’t walls; it’s smart design choices that guide your eye effortlessly from lounge to dining while keeping each zone distinct.
From color palettes to lighting strategies, these nine ideas will reshape how your space functions.
Treat Your Open Plan as One Cohesive Room
How do you create a unified space from separate zones? I’ve found that treating your open plan as a single, unified room rather than dividing it into distinct areas creates that luxurious, flowing feel we all want. This means making consistent design choices throughout: matching your color palette, repeating materials, and keeping proportions balanced from your living area to your dining space.
When I plan an open plan, I consider sight lines from multiple angles, making sure no focal imbalances disrupt the elegant flow. By choosing complementary furniture, coordinated textures, and a unified color strategy, you’ll create visual harmony that makes the entire space feel considered and connected. This unified approach turns what could feel fragmented into one graceful, inviting environment where you truly belong.
Choose a Color Palette That Spans Both Zones

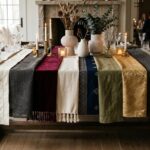
I’ll start by identifying what colors you already have, maybe a rich terracotta rug or copper-toned artwork, and use those as your guide across both rooms. Then I’ll extend that palette thoughtfully, repeating those dominant tones in your textiles, wall accents, and decor so your eye travels smoothly from the lounge into the dining area without jarring shifts.
Finally, I’ll bring in secondary accent colors like rust or terra cotta in smaller doses, creating visual balance and elegance without overwhelming either space.
Assess Existing Dominant Colors
Before you buy a single cushion or paint swatch, take time to really look at what’s already in your open plan space. I want you to identify the dominant colors that already exist, whether that’s the gray in your sofa, the warm wood tones in your dining table, or the cream walls surrounding everything.
| Zone | Dominant Color | Secondary Accent |
|---|---|---|
| Lounge | Soft gray | Warm wood |
| Dining | Natural wood | Cream walls |
| Shared Area | Neutral base | Accent potential |
These existing hues form your color palette foundation. By recognizing what’s already working, you’ll make choices that feel deliberate and unified.
You’re not starting from scratch. You’re building on what you love, creating harmony across both zones that feels right for your home.
Extend Palette Across Zones
Now that you’ve identified what’s already working in your space, it’s time to weave those colors intentionally through both your lounge and dining areas. Your open space thrives when a unified color palette connects these zones seamlessly.
Select a color from an existing piece, perhaps a rich rust rug or terra cotta accent wall, and let it guide your purchases throughout. Echo this tone in artwork, textiles, and decor across both rooms, creating visual bridges that tie everything together. When you repeat secondary accents like copper or warm neutrals, you’re building harmony that feels deliberate and refined.
This approach prevents jarring color clashes while maintaining the flowing, cohesive environment your open plan deserves. Think of your color palette as a thread running through every room, binding them into one beautiful, unified sanctuary.
Echo Secondary Color Accents
Once you’ve established your foundational palette, great things happen when you pull those secondary shades forward and repeat them thoughtfully across both zones. I’ve found that rust, copper, and terra cotta create gorgeous cohesion without overwhelming your space. Weave these tones through art, textiles, and smaller furniture pieces—a throw pillow here, a brass accent there—and suddenly your lounge and dining areas feel well-designed and connected.
Start with a focal piece like a rug featuring your chosen secondary color, then echo that shade through adjacent cushions and wall decor. Layer coordinating fabrics on banquettes, repeat brass hardware on accessories, and incorporate natural textures like jute. These repeated materials and colors link your surfaces together, making both zones read as one elegant, unified space where you’ll want to spend time.
Define Zones Without Walls or Dividers

How do you carve out separate spaces in an open floor plan without throwing up a wall? Strategic zoning creates distinct areas while maintaining that coveted open feeling. I’d recommend layering rugs, corner sofas, and area furniture to visually separate your living, dining, and kitchen zones. A banquette or sofa grouping elegantly defines your dining space while preserving sight lines across the room.
Here’s what matters: maintain a consistent color palette and repeat materials throughout to unify everything. Practically speaking, keep at least 36 inches of walkway between zones and 24 inches for chair access from walls to tables. This thoughtful arrangement allows logical flow from living to dining to kitchen, keeping pathways clear and inviting. You’ll create a sophisticated open plan that feels well-organized, not chaotic.
Repeat Fabrics and Wood Tones to Anchor Cohesion

When you repeat the same fabrics, like a warm linen or rich velvet, across your lounge seating, dining chairs, and storage pieces, you’re creating invisible threads that connect your whole space together. I’d recommend choosing two or three wood tones (say, light oak and dark walnut) and sticking with them for your cabinets, tables, and accent furniture, which makes the room feel deliberately planned rather than randomly assembled.
Layer in textures like woven rugs or jute accents in multiple zones, and you’ll establish visual continuity without everything looking matchy or boring.
Fabric Selection Across Zones
The key to making your open plan lounge and dining room feel purposefully arranged, rather than like two random rooms pushed together, lies in your fabric choices. Strategic fabric selection across zones creates visual harmony that ties your space together beautifully.
Consider these approaches:
- Repeat the same stripe or velvet upholstery on seating in both areas to establish immediate visual connection
- Choose complementary wood tones in banquettes or cabinetry that echo warm timber throughout your furniture pieces
- Pair textures like jute rugs with brass accents to subtly link zones without overwhelming the space
- Select two-fabric seating options that unify your look while providing elegant contrast between adjacent areas
Wood Tone Consistency Throughout
Why do some open plan spaces feel unified while others seem disconnected? I’ve found the answer lies in wood tone consistency throughout your entire room.
When I select a warm, neutral wood for my banquette, cabinetry, and benchtops, I create an invisible thread connecting my living, dining, and kitchen areas. This balance matters because our eyes naturally follow matching elements across open plan spaces.
I choose one wood species and finish, then repeat it deliberately. Whether it’s honey oak or walnut, consistency brings separate zones together into one elegant whole. I pair these wood tones with brass or copper hardware; this combination reinforces a warm-modern aesthetic that feels purposeful and luxurious.
Matching grain patterns and sheen across furniture pieces completes the effect. This approach anchors the space, making it feel purposeful, welcoming, and truly yours.
Textural Layering For Unity
How do you make an open plan space feel like one room instead of three separate ones? I’ve discovered that textural layering creates the cohesion you’re seeking. By strategically combining different fabrics and materials, you’ll weave together disconnected zones into a unified home.
- Repeat fabrics across seating areas, like using the same stripe and velvet on banquette cushions throughout your space
- Layer complementary textures such as velvet, wool, and jute to connect living, dining, and kitchen zones
- Pair primary fabrics with coordinating textiles like throw pillows and curtains for reinforced unity
- Match furniture silhouettes and pattern scales across all areas to maintain visual harmony
This approach isn’t complicated. You’re simply using elegant materials throughout, creating invisible threads that link your open concept together.
When guests walk through, they’ll sense belonging. Everything flows naturally and feels well-designed.
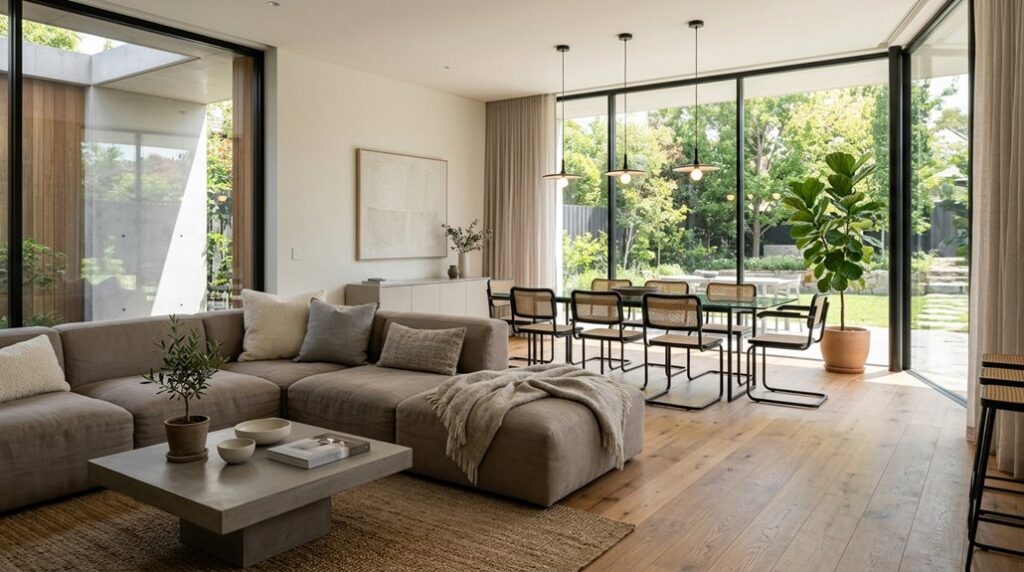
Use Lighting to Define Space and Guide Movement

Strategic lighting can define distinct, functional zones in your open plan without building walls or installing permanent dividers. I recommend positioning hanging pendants over your dining area, wall lights in the living space, and accent lighting in the kitchen. By installing separate circuits for each zone, you’ll control lighting independently, creating flexible evening ambiance tailored to your activities.
Add downlights in darker corners to balance illumination and eliminate dim spots. Consider floor sockets to keep wires hidden and maintain a tidy layout as you experiment with arrangements. This approach supports natural sight lines, helping furniture groupings feel intentional rather than scattered.
Lighting becomes your invisible guide, subtly defining boundaries while maintaining the open, airy feel you love.
Arrange Furniture to Create Natural Sightlines

I’ll show you how to arrange your furniture so your eye naturally flows through the space, creating an open, elegant feel that works beautifully for both lounging and dining. You’ll want to define clear traffic pathways, or invisible highways running through your room, by positioning your sofa, dining table, and other anchor pieces along lines that align with doorways and openings so people can move freely without zigzagging around obstacles.
Define Intentional Traffic Pathways
Why does furniture placement matter so much in an open plan room? Because intentional traffic pathways shape how you and your guests move through the space, creating an elegant flow that feels natural rather than cramped.
I’ve learned that defining clear routes prevents bottlenecks and makes your room feel larger. Here’s how to establish smart traffic patterns:
- Maintain 36–48 inch corridors between zones like living and dining areas
- Position seating to guide movement without blocking sightlines toward windows
- Use compact furniture and benchtop seating to define areas without crowding pathways
- Keep 50 inches of clearance between dining chairs and cabinets when tucked in
When you create these intentional pathways, your open plan becomes inviting. Movement feels effortless, and your space welcomes everyone who enters, making it truly yours.
Balance Visual Weight Distribution
How you arrange furniture shapes what your eyes see first, and that matters more than you might think. In your open plan space, visual weight distribution prevents any single area from feeling heavy or unbalanced.
I recommend placing anchor pieces like sofas away from walls, creating natural flow between zones. Position taller cabinets and artwork opposite lower-profile seating to guide your eye smoothly across the room. Echo wood tones, fabrics, and metal finishes throughout both living and dining areas for consistent balance.
Stand at your entrance and major seating spots to verify nothing overpowers the view. This simple practice creates an elegant, welcoming environment where every element belongs.
| Technique | Visual Effect |
|---|---|
| Off-wall anchor pieces | Promotes even flow |
| Graduated heights | Guides eye naturally |
| Echoed materials | Creates harmony |
| Strategic viewing checks | Maintains balance |
| Distributed color | Prevents dominance |
Position Furniture for Flow
Once you’ve balanced the visual weight across your open plan space, it’s time to guarantee your furniture actually lets people move through it comfortably. Strategic positioning creates natural flow, allowing guests and family to navigate effortlessly between your living and dining areas.
Here’s how to arrange your furniture intentionally:
- Maintain 36-inch walkways between furniture pieces for comfortable movement
- Allow 48 inches between living and dining zones for high-traffic areas
- Float seating groups away from walls to form conversation islands
- Position dining benches to define zones without blocking sightlines
These placements eliminate bottlenecks around coffee tables and rugs. When you arrange furniture thoughtfully, you’re not just creating an elegant open plan. You’re building an inviting space where people actually want to gather and linger together.
Check Your Design From Every Entry Point

When you’re standing in a doorway looking into your open plan lounge and dining room, you’re seeing your space from just one angle, but your family and guests will view it from many different vantage points throughout the day. I recommend walking through each entrance and noting what catches your eye first. Look for blank walls, awkward gaps, or areas that feel disconnected from the overall flow. Check whether furniture blocks sightlines or creates visual dead zones.
Use consistent colors and textures across these viewing angles to build a unified feel. Add texture, artwork, or accent pieces to underdecorated spots visible from doorways. Take photos from each entry point to identify imbalances in color distribution. This comprehensive approach helps your open plan feel welcoming, balanced, and consistent from every perspective.
Match Furniture Leg Styles and Proportions

Why do some open plan spaces feel perfectly put together while others seem scattered? I’ve found that matching furniture leg styles creates visual harmony that ties everything together. When your sofa, chairs, and dining table share similar leg shapes and materials, you’re establishing leg consistency that makes the space feel thoughtful and elegant.
Here’s how to master furniture proportions:
- Align sofa and lounge chair legs with your table legs in style and scale
- Choose apartment-sized sectionals with clean lines and visible leg clearance
- Pair banquette seating with matching leg profiles on adjacent cabinetry
- Echo wood tones or painted metal across all furniture legs
These thoughtful touches create rhythm throughout your open plan. When legs coordinate, your space becomes cohesive and grounded, reflecting your refined taste and attention to detail.
Commission Custom Seating to Unify Your Spaces

How can custom seating unify a scattered open plan? I commissioned a banquette that anchors my dining area, creating intentional boundaries without walls. This eight-foot bench, upholstered in contrasting Exeter stripe and Moss velvet fabrics, becomes a visual anchor that draws the eye and defines space.
Custom seating like mine solves the open plan puzzle by guiding traffic flow and establishing zones. I chose two-fabric styling for visual impact, pairing neutral wood tones with rich green accents. Integrated soft-close drawers maximize function while maintaining elegance.
When you invest in tailored seating, you’re creating belonging; a destination where your family naturally gathers. Your open plan no longer feels scattered. Instead, it becomes a cohesive home where every piece serves purpose and beauty.
Test Your Layout With Temporary Placement First

Before you purchase that perfect banquette or commit to a specific furniture arrangement, you’ll want to test your layout with items you already own. I’ve found this approach changes how I approach open plan living by revealing what truly works in my space.
Try these testing strategies:
- Move existing furniture to create your central seating group and evaluate traffic flow
- Photograph each arrangement from multiple angles to assess sight lines and balance
- Use cardboard cutouts or taped floor outlines to simulate large pieces without commitment
- Measure clearances carefully, aiming for 36–48 inches of walkway width between zones
This iterative process helps you discover the living room ideas that match your actual needs. You’ll pause, assess movement patterns, then adjust until everything feels unified and functional. Testing first prevents costly mistakes.