
No Churn Dairy Free Ice Cream is the perfect treat for those hot summer days when you crave something sweet and refreshing.
With its creamy texture and rich flavors, this homemade delight can be made without an ice cream maker, making it accessible to everyone.
The ability to customize flavors means you can create a version that suits your taste, from classic vanilla to exotic mango.
Whether you’re dairy intolerant or just looking for a healthier option, this recipe delivers a guilt-free indulgence that everyone will love.
The History and Cultural Significance
• No Churn Dairy Free Ice Cream Recipes trace their origins to the early 20th century, when ice cream became a popular dessert in many cultures.
• The evolution of dairy alternatives, particularly coconut and almond milk, allowed for the creation of dairy-free versions that appeal to a wider audience.
• In modern culinary culture, dairy-free ice cream is often enjoyed at summer gatherings, barbecues, and vegan festivals, symbolizing inclusivity.
• While many variations exist around the world, the authentic no churn version is characterized by its simplicity and the use of natural ingredients.
Recipe Overview
Nutritional Information (per serving)
Ingredients
Essential Equipment Guide
Blender: A high-speed blender is crucial for achieving a smooth and creamy texture, especially when blending frozen ingredients. Look for one with a powerful motor and multiple speed settings for best results.
Mixing Bowl: A large mixing bowl is necessary for combining your ingredients effectively. Opt for a bowl that is easy to handle and made from a material that won’t retain odors or stains.
Freezer-Safe Container: This is important for storing your ice cream as it freezes. Choose a container that is airtight to prevent freezer burn and easy to scoop from.
Preparation Methods
Blending: This technique involves thoroughly combining ingredients until smooth. It is essential for creating a creamy ice cream base that is free of lumps. Start with the liquids and gradually add in solids for uniform mixing.
Chilling: Allowing the mixture to chill before freezing enhances the texture and flavor. This step ensures that the ice cream sets properly and is easy to scoop. Aim for at least 2 hours in the refrigerator before transferring to the freezer.
Whipping: If using coconut cream, whipping it can introduce air into the mixture, resulting in a lighter texture. Use an electric mixer on medium speed until soft peaks form, then gently fold into the base.
Step 1: Gather Ingredients

Start by collecting all your ingredients on a clean surface.
This includes coconut milk, maple syrup, vanilla extract, and any flavor variations you wish to add.
Ensure that your coconut milk is chilled for optimal blending.
Measure out each ingredient to avoid any confusion during the mixing process.
Step 2: Blend the Base

In a high-speed blender, combine the coconut milk, maple syrup, and vanilla extract.
Blend on high until the mixture is completely smooth and creamy.
Scrape down the sides of the blender as necessary to incorporate all ingredients.
This step is crucial for achieving the desired texture of your ice cream.
Step 3: Prepare Flavor Variations

If you are adding fruit or other flavors, prepare them while the base blends.
For fresh fruits, wash, peel, and chop them into smaller pieces before pureeing.
For chocolate ice cream, sift in cocoa powder after blending the base and mix thoroughly.
This step allows you to customize the flavor of your ice cream to your liking.
Step 4: Mix in Flavorings

Once the base is blended, add any pureed fruits or peanut butter to the mixture.
Blend briefly to combine, but leave some chunks for texture if desired.
Taste the mixture and adjust sweetness or flavor as needed.
This is your opportunity to make the ice cream uniquely yours.
Step 5: Chill the Mixture

Transfer the blended mixture to a large mixing bowl and cover it with plastic wrap.
Refrigerate for at least 2 hours to chill thoroughly before freezing.
This step is important for a smoother icier texture once it’s frozen.
Be patient, as this will enhance the final product significantly.
Step 6: Freeze the Ice Cream

Pour the chilled mixture into a freezer-safe container.
Seal the container tightly to avoid freezer burn.
Place it in the freezer and let it set for at least 4 hours or until firm.
Check periodically to ensure the mixture freezes evenly.
Step 7: Scoop and Serve

Once the ice cream is fully frozen, remove it from the freezer and let it sit for a few minutes.
This will make scooping easier and prevent it from being too hard.
Use a warm ice cream scoop to serve into bowls or cones.
Garnish with fresh fruits or chocolate drizzle for an appealing presentation.
Critical Timing and Temperature Guide
Chilling Time: Chill the mixture for at least 2 hours in the refrigerator to ensure a smooth texture. Look for it to be cool to the touch and slightly thickened before freezing.
Freezing Time: Freeze the ice cream for a minimum of 4 hours or until firm. It should be solid and easy to scoop when it’s ready.
Serving Temperature: Let the ice cream sit at room temperature for 5-10 minutes before scooping. This softening is crucial for a perfect scoop.
Pro Tips for No Churn Dairy Free Ice Cream Recipes Simple Homemade Treat
• Ingredient Selection: Use high-quality coconut milk for the creamiest base. The brand can greatly affect the final texture.
• Preparation Secret: Incorporating air by whipping coconut cream can elevate your ice cream’s lightness.
• Temperature Management: Ensure all ingredients are cold before blending for a smoother base.
• Texture Enhancement: Adding a tablespoon of alcohol like vodka can improve texture and prevent ice crystals.
• Flavor Layering: Experiment with spices like cinnamon or nutmeg to add depth to your ice cream.
• Make-Ahead Strategies: Prepare the base a day in advance to save time on the day you plan to serve.
• Restaurant-Quality Finishing Touches: Serve with homemade sauces or toasted nuts for added flair.
• Equipment Optimization: Use a high-speed blender for the best results, as it ensures a creamy blend.
Troubleshooting Common Issues
• Texture Too Dense: This can happen if the mixture isn’t blended enough or if it’s frozen too quickly. To fix it, let it sit at room temperature for a few minutes and stir well before serving.
• Ice Crystals Forming: This occurs if the ice cream is not sealed properly or if it’s been stored for too long. Make sure your container is airtight and consume within a few days for best quality.
• Flavor Too Sweet: If the ice cream is overly sweet, balance it out with a pinch of salt or a splash of citrus juice.
• Hard to Scoop: If your ice cream is rock-solid, let it sit out for a few minutes before scooping. Alternatively, you can add a bit more liquid to the base next time.
• Flavor Not Strong Enough: If you find the flavor too subtle, try adding more of the flavoring ingredients next time or infusing them into the base before freezing.
Variations and Regional Differences
• Thai Coconut Ice Cream: This version incorporates pandan leaves and is served with toppings like sticky rice and peanuts, reflecting Thailand’s rich dessert culture.
• Italian Sorbetto: A fruit-based ice cream that uses pureed fruit and sugar, creating a refreshing and lighter treat common in Italy.
• Mexican Paletas: These frozen treats often include fresh fruits and spices, presenting a unique twist on the traditional ice cream experience.
• Modern Interpretations: Today, many chefs are experimenting with unique flavors like lavender or matcha, pushing the boundaries of traditional ice cream.
Food Science Behind the Recipe
• Emulsification: This process occurs when blending coconut milk with sweeteners, creating a uniform mixture that results in creamy ice cream. Understanding this helps in achieving the right texture.
• Freezing Point Depression: Adding sugar lowers the freezing point of the ice cream, preventing it from becoming too hard. Knowing how this works can help you adjust sweetness levels.
• Air Incorporation: Whipping air into the mixture during preparation creates a lighter texture. This principle is essential for achieving the perfect scoopable ice cream.
Frequently Asked Questions
What’s the most common mistake people make when preparing No Churn Dairy Free Ice Cream? The most common mistake is not blending the mixture thoroughly, which can lead to a grainy texture. Ensure all ingredients are fully combined for the best results.
Can I prepare components of this dish in advance? Yes, you can prepare the base a day in advance and store it in the refrigerator until you’re ready to freeze.
How do I adapt this recipe for dietary restrictions? To make it nut-free, substitute coconut milk with oat milk or soy milk.
What’s the best way to store and reheat leftovers? Store any leftover ice cream in an airtight container in the freezer for up to two weeks. No reheating necessary; simply let it soften before scooping.
Can I freeze this dish? Yes, this ice cream freezes beautifully. Just ensure it’s in an airtight container to prevent freezer burn.
What wine or beverages pair best with this dish? A light, fruity white wine or sparkling water complements the sweetness of the ice cream perfectly.
How can I scale this recipe up for a crowd? Simply multiply the ingredients by the number of servings desired, but consider using multiple containers for freezing to maintain even texture.
What side dishes complement this recipe best? Fresh fruit salads or light pastries pair excellently with this rich dessert.
How do professional chefs elevate this dish for restaurant service? Professional chefs often make their ice creams with unique flavor infusions and serve them with artisanal toppings.
Serving and Presentation Guide
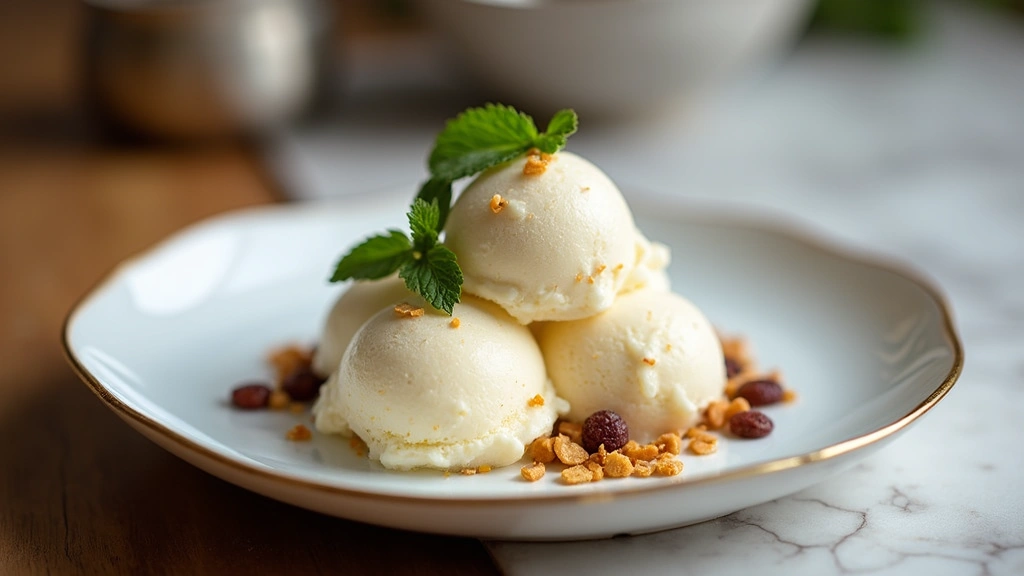
• Traditional Presentation: Serve the ice cream in chilled bowls with a garnish of fresh fruits and a sprig of mint for an appealing look.
• Modern Plating Ideas: Use an ice cream cone or a waffle bowl for a fun twist, adding a drizzle of sauce for extra flair.
• Accompaniment Suggestions: Pair with shortbread cookies or a refreshing fruit salad to enhance the dessert experience.
• Special Occasion Presentation: Use elegant glassware and layer the ice cream with different flavors for a visually stunning effect.
Conclusion
I hope this No Churn Dairy Free Ice Cream recipe inspires you to create your own delicious frozen treats.
It’s a simple yet satisfying way to enjoy a classic dessert without the dairy.
Don’t hesitate to experiment with flavors and toppings to make it uniquely yours.